Replacing an RV roof vent cover is important as it protects the vent and vent lid from the outside elements. It also helps keep temperatures and humidity in your RV in check, which keeps you safe and comfortable. The process of replacing an RV roof vent cover is relatively easy, as the vent will almost certainly come with instructions included. You should also use a self-leveling sealer to help set the vent against the roof, forming an airtight seam between the two. This ensures your new vent (or vent lid) won’t allow water leakage. Additionally, you can purchase an RV roof vent cover to protect the vent lid from damage while keeping it dry.
Below are the steps on how to replace the roof vent cover on an RV and the key factors you need to consider while choosing the right RV vent roof cover:
1. Size
It is important to make sure that the vent cover you choose is the right size for your RV. If the cover is too small, it may not fully cover the vent opening and could allow water, dirt, and other debris to enter your RV. On the other hand, if the cover is too large, it may not stay securely in place and could blow off while you are driving. To get the right size, measure the size of your vent opening and use these measurements to choose a cover that fits properly.
2. Material
RV roof vent covers are typically made of plastic or metal. Plastic covers are generally more lightweight and easier to install, but they may not be as durable as metal covers. They may also not provide as much protection from the elements as metal covers. Metal covers, on the other hand, are typically more durable and provide better protection from the elements, but they may be heavier and more difficult to install.
When choosing an RV vent cover, you should consider the material that the cover is made of as well as other factors such as the size of the cover, its style and design, and its price. You should also consider the specific needs and preferences of your RV and your own personal style.
3. Style
There are many different styles of RV vent covers to choose from, so you can choose one that complements the look of your RV and meets your specific needs. Some common styles of RV vent covers include:
1. Low profile: These covers sit close to the surface of the RV and have a streamlined appearance. They are a good choice for RVs with a modern or sleek design.
2. Flush mount: These covers sit flush with the surface of the RV and have a clean, unassuming appearance. They are a good choice for RVs with a more traditional or classic design
3. Raised: These covers sit higher off the surface of the RV and may have a more decorative appearance. They are a good choice for RVs with a more unique or distinctive design.
In addition to these styles, there are also many other types of RV vent covers to choose from, including dome-shaped covers, louver-style covers, and more. It’s important to choose a style that you like and that fits the overall design of your RV.
4. Compatibility
It’s important to make sure that the RV vent cover you choose is compatible with your RV’s vent system. Some covers are designed to be used with specific types of vents, such as power vents or fan vents. If you have a power vent or fan vent, it’s important to choose a cover that is specifically designed for use with these types of vents. Otherwise, the cover may not fit properly or may not work as intended.
It’s also important to consider the type of vent that you have when choosing an RV vent cover. For example, if you have a roof vent that is located in a flat or sloping part of the roof, you may need a different type of cover than if you have a vertical vent located on the side of the RV. Make sure to consider these factors when selecting a cover to ensure that you get the right one for your RV.
5. Price
RV vent covers can vary significantly in price, depending on the size, material, and style of the cover. Prices for RV vent covers can range from around $10 to $50 or more. When choosing an RV vent cover, it’s important to consider your budget and choose a cover that fits your price range.
It’s also a good idea to shop around and compare prices from different retailers to make sure you are getting the best deal. You may be able to find a high-quality cover at a more affordable price if you take the time to compare prices and look for sales or discounts.
By considering these factors, you should be able to find an RV vent cover that meets your needs and fits your RV perfectly.
Replacing an RV roof vent cover is a relatively simple task that can be accomplished with a few basic tools and some basic DIY skills. Here is a general overview of the steps involved in replacing an RV roof vent cover:
Step 1: Gather the necessary tools and materials.
Before you start the installation process, it’s important to gather the necessary tools and materials. You will need a screwdriver or drill (depending on the type of fasteners used to secure the cover), a ladder, and the new roof vent cover.
Make sure that you have all of the tools and materials that you need before you start the installation process. This will help to ensure that the installation goes smoothly and that you don’t have to interrupt the process to go get something you forgot.
If you are unsure about what tools or materials you need for the installation, you can check the instructions that came with the cover or consult the manufacturer’s website for more information. It’s always a good idea to follow the instructions provided by the manufacturer to ensure that the installation is done correctly and safely.
Step 2: Screws or clips
Locate the screws or clips that hold the old vent cover in place. These will typically be located around the edges of the cover. They could be hidden beneath a trim or sealant.
Step 3: Remove the screws or clips
Using a screwdriver or pliers, remove the screws or clips that are holding the old vent cover in place. Be careful not to damage any surrounding materials or surfaces.
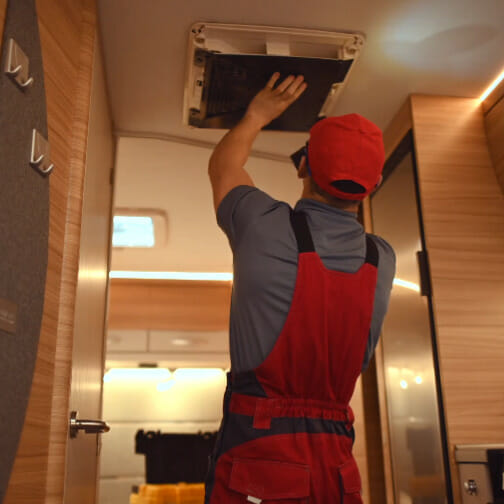
Step 4: Lift the old cover
Carefully lift the old cover off of the vent. If the cover is stuck or difficult to remove due to sealant, you may need to gently try it loose using a flat tool, such as a screwdriver. Once the old cover is removed, you will be able to access the vent underneath.
Step 5: Install the new cover
To install the new cover, place it over the vent and secure it in place using the screws or clips that you removed earlier. Make sure that the cover is securely fastened and that it fits snugly over the vent.
Step 6: Check for proper sealing
After you have completed all these steps, it is essential to check for proper sealing to avoid any water leakage.
conclusion
In conclusion, replacing the roof vent cover on an RV is a relatively simple task that can be accomplished with a few basic tools and supplies. It’s a good idea to have a helper hold the cover in place while you secure it, as this will make the process easier and ensure that the cover is properly aligned. If you have any difficulty replacing the cover, you may want to consider seeking the help of a professional RV technician.