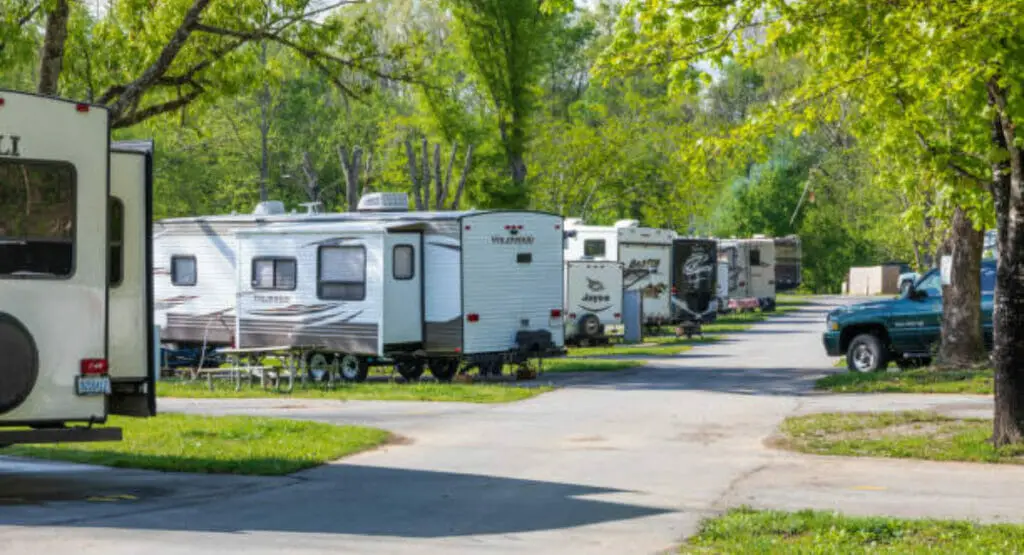
Appropriate RV sewage disposal is not only necessary for campers’ and the environment’s health and safety but it is also mandated by law in most locations. In this article, we’ll look at why connecting your RV sewage system to your septic system is important, as well as how to do it correctly to minimize any health concerns and environmental risks.
RV sewage disposal can be a difficult procedure, but it is critical to ensure that wastewater is correctly disposed of. Improper RV sewage disposal can contaminate water supplies, cause environmental harm, and pose health risks. By following the instructions in this guide, you’ll learn how to connect your RV sewage system to your septic system securely, effectively, and in conformity with local rules.
I. RV sewage disposal planning
There are a few things you should do before connecting your RV sewage system to your septic system to ensure the operation is safe and in accordance with local standards.
1. Selecting the correct septic system:
If you intend to connect your RV sewage system to your septic system, make sure that your septic system is capable of handling the additional affluent. To verify that your septic system is appropriately suited to handle RV sewage, consult with a professional septic system installer or inspector.
2. Checking local regulations and permits:
Before connecting your RV sewage system to your septic system, check with your local health authority to see if there are any regulations or permits required. Municipal rules may stipulate the type of septic system necessary, the distance from the intake of the septic system, and other aspects that may affect the process’s safety and legality.
3. Preparing the RV sewage tank for safe disposal:
Before connecting your RV sewage system to your septic system, empty the RV sewage tank and dispose of the trash at a designated RV dump site. To ensure that the RV sewage tank is safe and sanitary for future usage, apply a specialized cleaner to eliminate any buildup and odors.
By following these procedures to prepare for RV sewage disposal, you can ensure that the operation is safe, in accordance with local standards, and free of potential health and environmental problems.
II. Linking RV sewage to a septic system
After you’ve made the necessary preparations for RV sewage disposal, it’s time to connect your RV sewage system to your septic system. Take these procedures to ensure a secure and fruitful connection.
1. Required tools and equipment:
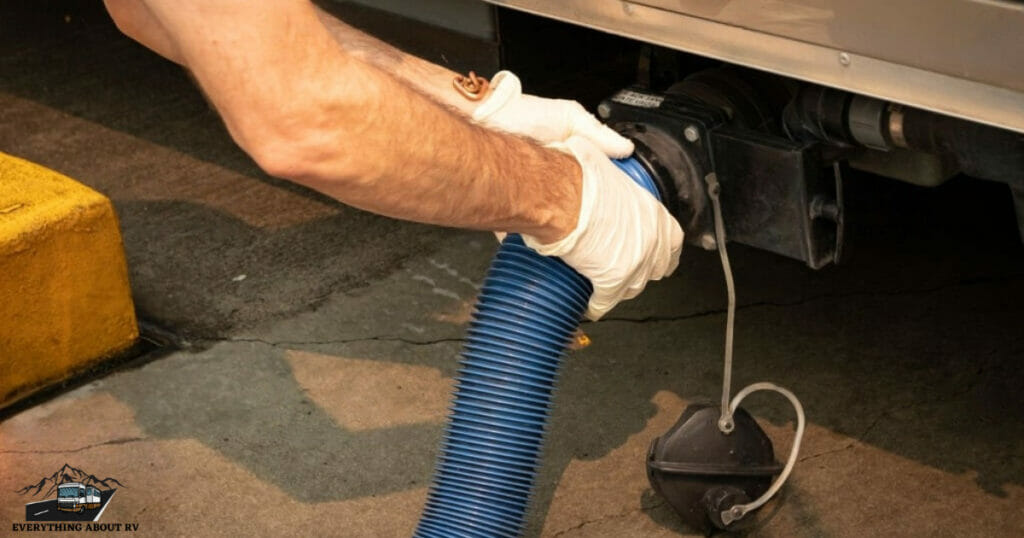
A sewer hose, a septic system adapter, gloves, and eye protection are required to connect your RV sewage system to your septic system. It’s also a good idea to keep a garden hose and a bucket of water nearby in case any obstructions or debris need to be flushed out.
2. Step-by-step steps for establishing a secure connection:
Step 1: Locate the septic system inlet: The septic system inlet should be located near the septic tank or drain field. Set aside the cap or lid after removing it.
Step 2: Install the septic system adapter: Connect the septic system adapter to the inlet of the septic system. To avoid leaks, ensure that it is secure and tight.
Step 3: Attach the sewer hose as follows: Attach the sewer hose to the RV sewage outlet and the septic system adaptor at one end. To avoid leaks, ensure that it is secure and tight.
Step 4: Open the sewage tank valve on your RV: Let the wastewater run through the hose and into the septic system by slowly opening the RV sewage tank valve. Flush any residual waste from the RV sewage tank with a garden hose.
Step 5: Flush the hose and adapter: Close the RV sewage tank valve and use the bucket of water to flush out the sewer line and adapter after the RV sewage tank is empty. Remove the sewer hose from the septic system adapter and the RV sewage exit.
Step 6: Shut the septic system inlet: Reinstall the cover or lid on the septic system inlet and tighten it down.
3. Troubleshooting frequent issues:
If you suffer any complications during the connecting process, such as clogs or leaks, make sure to switch off the RV sewage tank valve immediately to prevent any overflow or spills. Inspect the hose and adapter for any obstructions or damage, then flush away any clogs or debris with the garden hose.
By following these steps and addressing typical issues, you may connect your RV sewage system to your septic system securely and successfully, avoiding potential health hazards and environmental risks.
III.Maintaining the RV sewage tank and septic system
It is critical to maintaining your RV sewage tank and septic system to ensure optimal operation and lifespan. Follow these cleaning and maintenance suggestions and learn how to recognize and fix potential problems.
1. Cleaning and maintenance hints:
a. Regularly empty the RV sewage tank: Empty your RV sewage tank on a regular basis to keep it from overflowing and posing significant health and environmental problems.
b. Apply tank treatments: To break down waste and reduce odors in the RV sewage tank, use tank treatments or chemicals.
c. Flush the RV sewage tank: After each usage, flush the RV sewage tank with water to prevent waste buildup and clogs.
d. Septic System: Regularly inspect the septic system for evidence of leaks or damage.
e. Pump the septic system: Has the septic system flushed as needed to avoid overflow and damage to the system.
2. Signs of potential problems and how to fix them:
a. Slow draining or clogging: If the RV sewage tank is sluggishly draining or clogging, remove any blockages using a plunger or sewer snake. If the condition persists, it may suggest a broader issue in the septic system that necessitates professional intervention.
b. Bad odors: Bad odors may signal that the RV sewage tank or septic system needs to be emptied or tank treatments applied. If the condition persists, it may suggest a broader issue in the septic system that necessitates professional intervention.
c. Overflows or backups: Overflows or backups may signal that the septic system is full or damaged. Stop using the RV’s sewage system right once and contact a professional to inspect and fix the septic system.
You can assure the correct operation and lifespan of your RV sewage tank and septic system by following these cleaning and maintenance suggestions and knowing how to recognize and remedy possible problems.
Conclusion
In conclusion, appropriate RV sewage disposal is critical for both the health and safety of RV owners and the environment. You can avoid potential health hazards and environmental risks by selecting a suitable septic system, preparing your RV sewage tank for safe disposal, properly connecting it to the septic system, and periodically maintaining both the RV sewage tank and the septic system.
Remember to always follow local restrictions and permissions when disposing of RV sewage. By doing so, you can enjoy your RV excursions while being responsible and considerate of the environment and your fellow campers.
Finally, we hope this article has provided you with useful information and methods for disposing of RV sewage properly and responsibly. Safe travels!