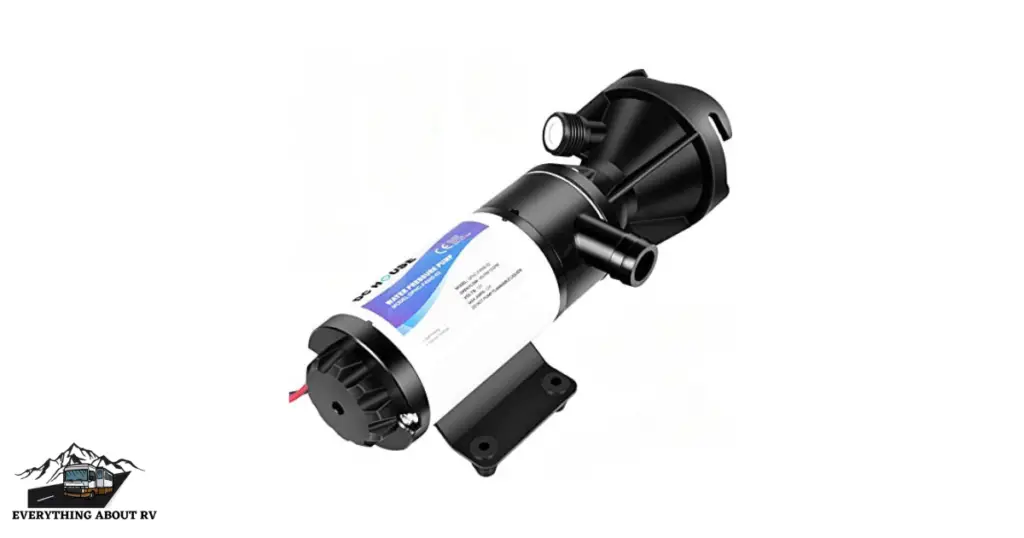
A sewage ejector pump is a necessary part of an RV’s wastewater system. It facilitates the transfer of wastewater from the holding tank to the septic system or sewage hookup. RV owners would have to rely on gravity or manual ways to dispose of their wastewater if they did not have a sewage ejector pump. In this post, we’ll go over the advantages of using a sewage ejector pump in an RV, as well as how to install and maintain one.
I. Benefits of Using a Sewage Ejector Pump in an RV
Using a sewage ejector pump in your RV has several benefits, including:
1. Improved sanitation:
A sewage ejector pump aids inappropriately disposing of wastewater, lowering the danger of contamination and unpleasant odors. This is especially critical for RV owners who travel frequently and may not always have access to a dependable sewage hookup.
2. Convenience:
A sewage ejector pump eliminates the need to rely on gravity to dispose of wastewater. This allows you to park your RV in more places, including those without gravity-fed sewage hookups. It also means you’ll be able to spend more time enjoying your vacation and less worrying about wastewater disposal.
3. Reduced maintenance:
Proper wastewater disposal decreases the possibility of clogs and other problems in your RV’s plumbing system. This can save you time and money in the long term by avoiding costly repairs or replacements.
II. How to Install a Sewage Ejector Pump in an RV
Installing a sewage ejector pump in your RV can be done in a few simple steps:
Step 1. Choose the right location:
The first step is to locate the optimal sewage ejector pump site. Look for a location near the RV’s holding tank and sewer hookup. It should also be at a convenient location for accessing the pump and doing maintenance.
Step 2: Gather the following tools and equipment:
To install the pump, you’ll need a screwdriver, pliers, wrenches, and PVC pipes and fittings, among other things. It is also advisable to keep some silicone sealer on hand.
Step 3: Install the inlet and outlet pipes:
Next, connect the sewage ejector pump’s inlet and output pipes. These pipes will connect to the holding tank of the RV and the sewer connection, respectively. To make a secure and watertight connection, use PVC pipes and fittings.
Step 4: Install the pump:
Once the pipes are in place, the sewage ejector pump should be installed. Secure the pump in place with screws or other fasteners, making sure it’s level and stable.
Step 5: Connect the electrical wiring:
Last but not least, connect the electrical connection to the pump. To guarantee that the wire is properly fitted and safe to use, carefully follow the manufacturer’s instructions. Turn on the pump and test it to ensure that the wiring is correctly connected.
You may install a sewage ejector pump in your RV and enjoy the benefits of increased cleanliness, convenience, and decreased maintenance by following these steps.
III. Maintenance Tips for a Sewage Ejector Pump in an RV
Certainly, here are some maintenance tips for a sewage ejector pump in an RV:
1. Regularly clean the holding tank:
Clean the holding tank on a regular basis to avoid accumulation and obstructions. Use an RV-specific holding tank cleanser to break down waste and keep the tank clean.
2. Use readily dissolving toilet paper:
Certain types of toilet paper can cause clogs in the sewage ejector pump and other sections of the RV’s plumbing system. To avoid these concerns, choose toilet paper that is designed to degrade quickly.
3. Inspect the pump and pipelines for damage:
Inspect the sewage ejector pump and pipelines on a regular basis for indicators of damage or wear and tear. Examine the pump for cracks, leaks, and other problems that could impair its function.
4. Clean the pump and inspect the float switch:
Every few months, clean the pump and inspect the float switch. Remove any debris or buildup from the pump with a soft brush or cloth, and check that the float switch works properly.
5. Replace the pump as needed:
If the sewage ejector pump is not performing properly or is exhibiting indications of wear and tear, it may need to be replaced. When replacing the pump, carefully follow the manufacturer’s instructions to ensure it is installed correctly and safely.
By following these maintenance tips, you can keep your sewage ejector pump in good working order and avoid costly repairs or replacements down the line.
Conclusion
Finally, a sewage ejector pump is an excellent addition to any RV’s wastewater management system, improving sanitation and convenience. Installing the pump in the proper area and carefully following the manufacturer’s instructions can result in a successful installation. Cleaning the holding tank, inspecting the pump and pipelines for damage, and testing the float switch on a regular basis can help keep the pump in good working order. By following these instructions, RV owners will be able to reap the benefits of a well-running sewage ejector pump for many years to come.


