
Cleaning the RV black water tank is critical for various reasons, the most important of which are health, sanitation, and overall comfort while RVing. Neglecting to clean the black water tank can result in unpleasant odors, potential health hazards, and plumbing system clogs. You can ensure a sanitary and trouble-free road trip by cleaning and maintaining your RV’s black water tank on a regular basis. In this article, we will discuss 5 ways to clean RV black water tank
I. Method 1: Flushing with Water and RV Tank Cleaner
Flushing your RV’s black water tank with water and using an RV tank cleaner is a tried and true method for cleaning and maintaining the tank’s hygiene. Flushing with water and RV tank cleaners entails combining water with a specialized cleaning solution for RV black water tanks. The water aids in the removal of waste and debris, while the tank cleaner aids in the breakdown of solid waste, the control of odors, and the disinfection of the tank. Here are the step-by-step instructions for effectively implementing it:
1. Collect all of the necessary equipment:
Before beginning the cleaning process, make sure you have the following items on hand: gloves, a hose suitable for RV use, and a manufacturer-recommended RV tank cleaner.
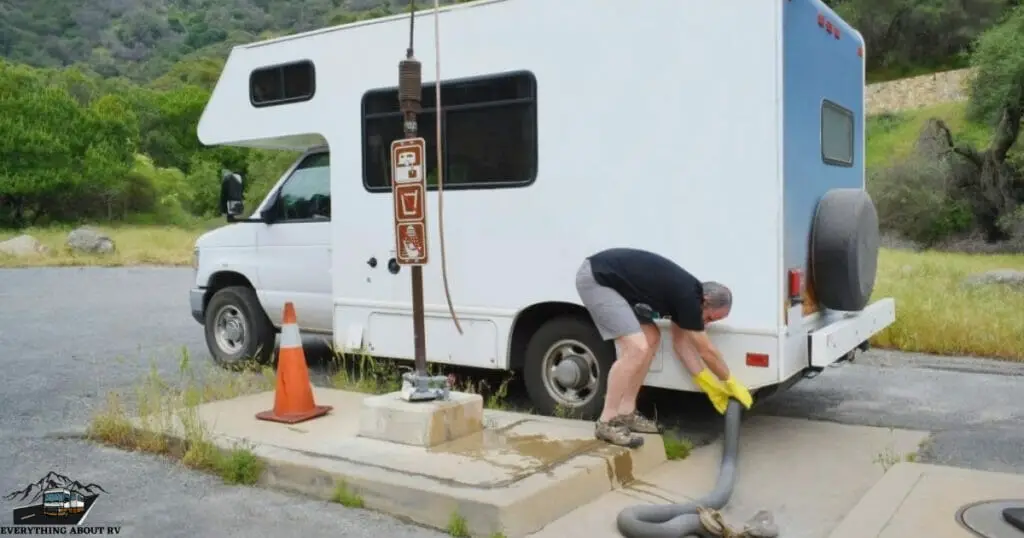
2. Park your RV in an appropriate location:
Select a location that is close to a sewage dump station or a sewer connection. This will make it easier to dispose of the tank’s contents after cleaning.
3. Empty the tank’s contents:
Connect the sewer hose to the dump station or sewer connection, and open the tank’s valve to empty its contents completely. Ensure that the valve is closed tightly afterward.
4. Fill the tank with fresh water:
Fill the tank with fresh water using a hose until it reaches the desired level. This will supply enough water for the cleaning process.
5. Add the RV tank cleaner:
Follow the manufacturer’s instructions and add the recommended amount of RV tank cleaner into the black water tank. The cleaner will help break down waste and eliminate odors.
6. Allow the tank cleaner and water mixture to sit:
Allow the tank cleaner and water mixture to sit in the tank for the time recommended by the manufacturer. This allows the cleaning solution to work more effectively at breaking down waste and removing any lingering odors.
7. Flush the tank:
Reopen the tank’s valve and drain the water and cleaning solution mixture completely. This will aid in the removal of loosened waste and the thorough cleaning of the tank.
8. Close the valve and repeat the flushing process with fresh water:
After emptying the tank, close the valve and repeat the flushing process with fresh water. This step ensures that any remaining residue and cleaner are completely rinsed out of the tank, leaving it clean and fresh.
9. Close the tank’s valve and make sure it’s securely closed:
Close the valve tightly after the tank has been thoroughly flushed and cleaned to prevent leaks or odors.
If you follow these steps, you can effectively clean your RV black water tank using the flushing method with water and an RV tank cleaner. This method of regular maintenance and cleaning of the black water tank will help maintain a sanitary environment, prevent foul odors, and ensure the smooth operation of your RV’s plumbing system.
II. Method 2: Using Natural Cleaning Agents
Natural cleaning agents are an environmentally friendly way to clean your RV’s black water tank. Instead of using chemical-based cleaners, you can clean your RV’s black water tank with natural cleaning agents. Natural cleaning agents, such as vinegar and baking soda, are both effective and environmentally friendly. These agents aid in the breakdown of waste, the elimination of odors, and the sanitation of your tank. Here are the step-by-step instructions for effectively implementing it:
1. Prepare the following materials:
Collect the following materials: white vinegar, baking soda, water, gloves, and a bucket or container to mix the cleaning solution in.
2. Empty the tank contents:
Begin by connecting the sewer hose to the dump station or sewer connection, then open the tank’s valve completely to empty the contents. After that, make sure the valve is tightly closed.
3. Gather the following supplies:
Gather the following items: white vinegar, baking soda, water, gloves, and a bucket or container to mix the cleaning solution.
4. Pour the vinegar and water solution into the tank:
Through the toilet or an access point to the black water tank, pour the vinegar and water solution into the tank. The vinegar’s acidity helps break down waste and neutralizes odors.
5. Add baking soda to the tank:
Add about one cup of baking soda to the tank after adding the vinegar and water mixture. Baking soda acts as a natural deodorizer and also helps with cleaning.
6. Allow the mixture to sit:
Leave the vinegar, water, and baking soda mixture in the tank for a few hours or overnight. This enables natural agents to effectively break down waste and eliminate odors.
7. Flush the tank with clean water:
After the time has passed, flush the tank with clean water. Rinse the tank thoroughly with the RV’s water supply or a hose. Ensure that the mixture of vinegar, water, and baking soda is completely flushed out.
8. Close the tank’s valve:
Once the tank has been rinsed, tightly close the valve to prevent any leaks or odors.
By following these steps, you can effectively clean your RV’s black water tank using natural cleaning agents. This method offers an environmentally friendly approach while providing effective cleaning and odor control. Regularly using biological cleaning agents helps maintain a fresh and sanitized black water tank for your RVing adventures.
III. Method 3: Utilizing a Tank Rinser
Using a tank rinser is a quick and easy way to clean your RV’s black water tank. A tank rinser is a specialized tool used to thoroughly clean RV black water tanks. It dislodges waste and debris and rinses the tank’s surfaces by spraying pressurized water throughout the tank. Tank rinsers come in a variety of styles, including those that connect to a hose or directly to the RV’s water system. Here are the step-by-step instructions for successfully implementing it:
1. Purchase an appropriate tank rinser:
Select a tank rinser that is compatible with your RV’s black water tank. Consider things like usability, effectiveness, and compatibility with your RV’s plumbing system.
2. Empty the tank’s contents:
Connect the sewer hose to the dump station or sewer connection, and open the tank’s valve to empty the contents completely. Ensure that the valve is closed tightly afterward.
3. Connect the tank rinser:
Depending on the type of tank rinser you have, connect it to a hose or directly to your RV’s water system according to the manufacturer’s instructions.
4. Insert the tank rinser:
Insert the tank rinser into the black water tank via the toilet or another access point. Ascertain that it is properly positioned.
5. Turn on the water:
Whether it’s from a hose or your RV’s water system, turn on the water supply. The tank rinser will squirt pressurized water all over the tank.
6. Rotate the tank rinser:
Rotate the tank rinser inside the tank to ensure that all areas are thoroughly rinsed. Pay special attention to corners, crevices, and sensors, which tend to collect waste and debris.
7. Rinse the tank until the water runs clear:
Rinse the tank until the water running out of the tank rinser runs clear. This means that the majority of the waste and debris has been dislodged and rinsed away.
8. Close the tank’s valve:
After thoroughly rinsing the tank, close the valve tightly to prevent leaks or odors.
Using a tank rinser simplifies the cleaning process and ensures that your RV’s black water tank is thoroughly cleaned. A tank rinser is useful for maintaining cleanliness, preventing clogs, and reducing odors. Consider purchasing a high-quality tank rinser for easy and effective cleaning of your RV’s black water tank.
IV. Method 4: Hydro Jetting the Black Water Tank
The method of hydro jetting the black water tank entails using a specialized attachment to thoroughly clean and flush the tank with high-pressure water. It is a strong and efficient method for removing stubborn buildup and debris from the black water tank. It has a hydro jetting attachment that delivers high-pressure water streams to dislodge waste and clean the tank’s surfaces thoroughly. This method is especially useful when dealing with large amounts of waste or stubborn waste deposits. Here are the step-by-step instructions for effectively implementing it:
1. Consult an expert or make use of a specialized hydro jetting attachment:
Because hydro jetting can be a complicated process, it is best to consult a professional or use a hydro jetting attachment designed specifically for RV black water tanks. Follow all safety precautions and manufacturer instructions.
2. Empty the tank’s contents:
Connect the sewer hose to the dump station or sewer connection, and open the tank’s valve to empty the contents completely. Ensure that the valve is closed tightly afterward.
3. Connect the hydro jetting attachment:
Connect the hydro jetting nozzle or attachment to a suitable water source, such as a hose or the water system of your RV. To ensure a proper connection, follow the manufacturer’s instructions.
4. Insert the attachment into the tank:
Place the hydro jetting attachment in the black water tank via the toilet or another access point. Ascertain that it is properly positioned.
5. Turn on the water supply and the hydro jetting system:
Turn on the water supply and the hydro jetting system. The high-pressure water streams will clear the tank’s surfaces of waste, debris, and buildup.
6. Move the attachment around the tank:
Move the hydro jetting attachment around the tank, making sure to thoroughly clean all areas. Pay close attention to corners, crevices, and sensors, as these are common places for waste to accumulate.
7. Continue the process until the water runs clear:
Continue jetting the tank until the water flowing out of it is clear. This means that the majority of the waste and debris has been effectively removed.
8. Close the tank’s valve:
After thoroughly cleaning the tank, close the valve tightly to prevent any leaks or odors.
You can effectively remove stubborn waste and buildup from your RV black water tank by using hydro jetting. This method is especially useful when other cleaning methods aren’t working. If you are unsure about performing hydro jetting yourself, seek the advice of a professional. Regular maintenance and cleaning with hydro jetting will assist in keeping your black water tank clean, preventing clogs, and reducing odors.
V. Method 5: Enzyme-based Tank Treatments
Using enzyme-based tank treatments is a popular way to keep your RV’s black water tank clean and odor-free. Enzymes aid in the natural breakdown of waste and the control of odors. Natural enzymes are used in enzyme-based tank treatments to aid in the breakdown of waste matter in the black water tank. These treatments come in a variety of forms, including liquid, powder, and drop-in packets. Enzymes aid in the breakdown of solid waste, the elimination of odors, and the decomposition of organic matter within the tank. Here are the step-by-step instructions for effectively implementing it:
1. Purchase a tank treatment product that is enzyme-based:
Look for a reputable supplier that provides enzyme-based tank treatments designed specifically for RV black water tanks. Consider factors such as effectiveness, user reviews, and tank compatibility.
2. Empty the tank’s contents:
Connect the sewer hose to the dump station or sewer connection, and open the tank’s valve completely to empty the contents. After that, make sure the valve is tightly closed.
3. Stick to the manufacturer’s recommendations:
Read the manufacturer’s instructions for the enzyme-based tank treatment product. Each product may have its own set of instructions for use and dosage.
4. Pour the recommended amount of treatment into the tank:
Follow the manufacturer’s instructions to determine the appropriate amount of enzyme-based treatment to use. Typically, you will pour the recommended amount directly into the black water tank.
5. Add fresh water to the tank:
After adding the enzyme-based treatment, add fresh water to the tank. This helps distribute the treatment evenly throughout the tank and aids in the decomposition process.
6. Allow the treatment to sit in the tank:
Allow the enzyme-based treatment to sit in the tank for the manufacturer’s recommended time. This enables the enzymes to effectively break down waste and control odors.
7. Close the tank’s valve:
After the specified time, tightly close the tank’s valve to prevent any leaks or odors.
Enzyme-based tank treatments are a simple and effective way to keep your black water tank clean and odor-free. Regular use of these treatments promotes waste breakdown and reduces the buildup of odor-causing bacteria. For best results, follow the manufacturer’s instructions and consider using enzyme-based treatments as part of your regular tank maintenance routine.
Conclusion:
Maintaining and cleaning your RV’s black water tank on a regular basis is essential for a pleasant and sanitary RVing experience. New RVers can effectively clean their black water tanks and prevent odors and clogs by following the methods outlined in this blog post. Remember to select the method that best suits your preferences and needs, and to always prioritize safety and proper waste disposal. You’ll be able to enjoy your RV adventures with confidence and comfort if you use these cleaning techniques.
When performing any maintenance or cleaning tasks on your RV’s black water tank, remember to follow the manufacturer’s guidelines and safety recommendations.